1.Spring配置数据源
1.1 数据源(连接池)的作用
数据源(连接池)是提高程序性能如出现的
事先实例化数据源,初始化部分连接资源
使用连接资源时从数据源中获取
使用完毕后将连接资源归还给数据源
常见的数据源(连接池):DBCP、C3P0、BoneCP、Druid等
开发步骤
①导入数据源的坐标和数据库驱动坐标
②创建数据源对象
③设置数据源的基本连接数据
④使用数据源获取连接资源和归还连接资源
1.2 数据源的手动创建
①导入c3p0和druid的坐标
<!-- C3P0连接池 -->
<dependency>
    <groupId>c3p0</groupId>
    <artifactId>c3p0</artifactId>
    <version>0.9.1.2</version>
</dependency>
<!-- Druid连接池 -->
<dependency>
    <groupId>com.alibaba</groupId>
    <artifactId>druid</artifactId>
    <version>1.1.10</version>
</dependency>
①导入mysql数据库驱动坐标
导入数据库
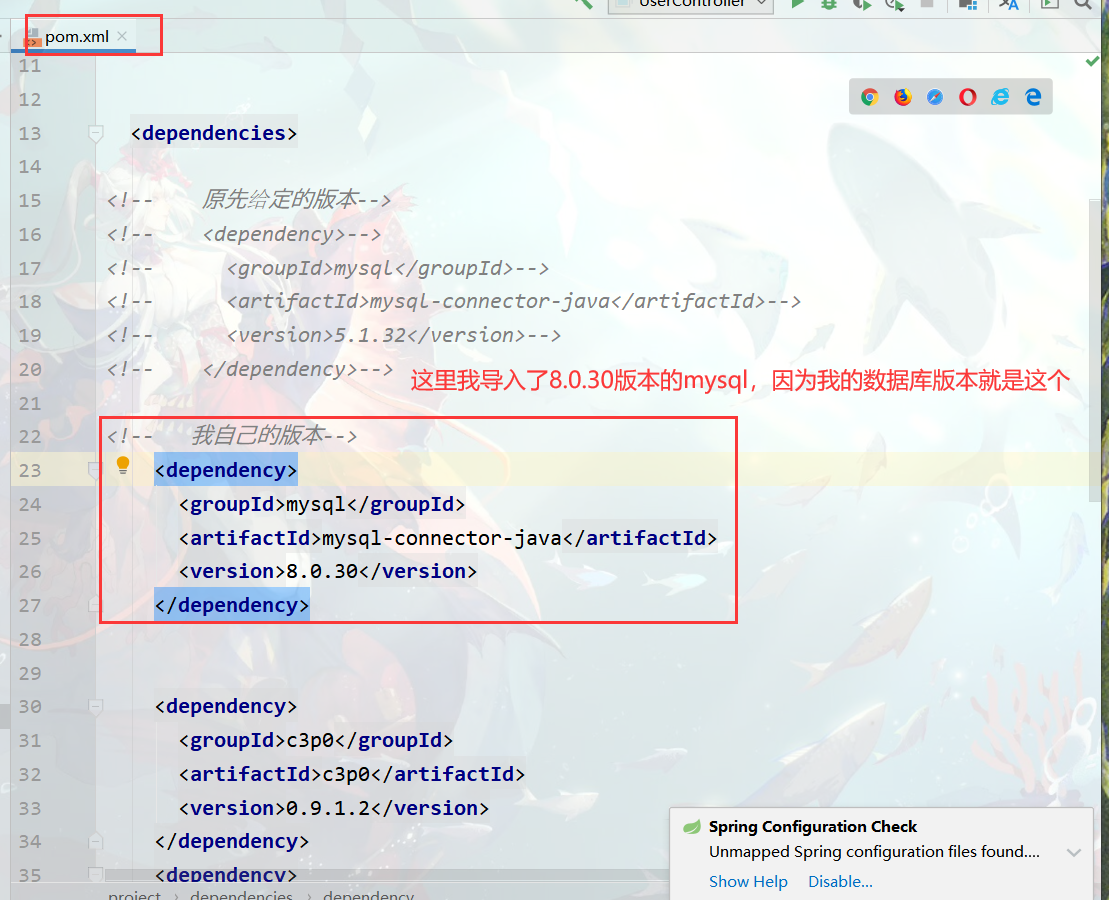
我的配置
<!--   我自己的版本-->
    <dependency>
      <groupId>mysql</groupId>
      <artifactId>mysql-connector-java</artifactId>
      <version>8.0.30</version>
    </dependency>
<!-- mysql驱动 -->
<dependency>
<groupId>mysql</groupId>
<artifactId>mysql-connector-java</artifactId>
<version>5.1.39</version>
</dependency>②创建C3P0连接池
@Test
public void testC3P0() throws Exception {
    //创建数据源
    ComboPooledDataSource dataSource = new ComboPooledDataSource();
    //设置数据库连接参数
    dataSource.setDriverClass("com.mysql.jdbc.Driver");                                    dataSource.setJdbcUrl("jdbc:mysql://localhost:3306/test");
    dataSource.setUser("root");
    dataSource.setPassword("root");
    //获得连接对象
    Connection connection = dataSource.getConnection();
    System.out.println(connection);
}
②创建Druid连接池
@Test
public void testDruid() throws Exception {
    //创建数据源
    DruidDataSource dataSource = new DruidDataSource();
    //设置数据库连接参数
    dataSource.setDriverClassName("com.mysql.jdbc.Driver");
    dataSource.setUrl("jdbc:mysql://localhost:3306/test");
    dataSource.setUsername("root");
    dataSource.setPassword("root");
    //获得连接对象
    Connection connection = dataSource.getConnection();
    System.out.println(connection);
}
③提取jdbc.properties配置文件
jdbc.driver=com.mysql.cj.jdbc.Driver
jdbc.url=jdbc:mysql://localhost:3306/test_spring
jdbc.username=root
jdbc.password=123321
我的配置:

④读取jdbc.properties配置文件创建连接池
@Test
public void testC3P0ByProperties() throws Exception {
    //加载类路径下的jdbc.properties
    ResourceBundle rb = ResourceBundle.getBundle("jdbc");
    ComboPooledDataSource dataSource = new ComboPooledDataSource();
    dataSource.setDriverClass(rb.getString("jdbc.driver"));
    dataSource.setJdbcUrl(rb.getString("jdbc.url"));
    dataSource.setUser(rb.getString("jdbc.username"));
    dataSource.setPassword(rb.getString("jdbc.password"));
    Connection connection = dataSource.getConnection();
    System.out.println(connection);
}
1.3 Spring配置数据源
可以将DataSource的创建权交由Spring容器去完成
DataSource有无参构造方法,而Spring默认就是通过无参构造方法实例化对象的
DataSource要想使用需要通过set方法设置数据库连接信息,而Spring可以通过set方法进行字符串注入
<bean id="dataSource" class="com.mchange.v2.c3p0.ComboPooledDataSource">
    <property name="driverClass" value="com.mysql.jdbc.Driver"/>
    <property name="jdbcUrl" value="jdbc:mysql://localhost:3306/test"/>
    <property name="user" value="root"/>
    <property name="password" value="root"/>
</bean>
测试从容器当中获取数据源
ApplicationContext applicationContext = new
           ClassPathXmlApplicationContext("applicationContext.xml");
               DataSource dataSource = (DataSource)
applicationContext.getBean("dataSource");
Connection connection = dataSource.getConnection();
System.out.println(connection);
1.4 抽取jdbc配置文件
applicationContext.xml加载jdbc.properties配置文件获得连接信息。
首先,需要引入context命名空间和约束路径:
命名空间:xmlns:context="http://www.springframework.org/schema/context"
约束路径:http://www.springframework.org/schema/context
http://www.springframework.org/schema/context/spring-context.xsd
<context:property-placeholder location="classpath:jdbc.properties"/>
<bean id="dataSource" class="com.mchange.v2.c3p0.ComboPooledDataSource">
    <property name="driverClass" value="${jdbc.driver}"/>
    <property name="jdbcUrl" value="${jdbc.url}"/>
    <property name="user" value="${jdbc.username}"/>
    <property name="password" value="${jdbc.password}"/>
</bean>
1.5 知识要点
Spring容器加载properties文件
<context:property-placeholder location="xx.properties"/>
<property name="" value="${key}"/>
2. Spring注解开发
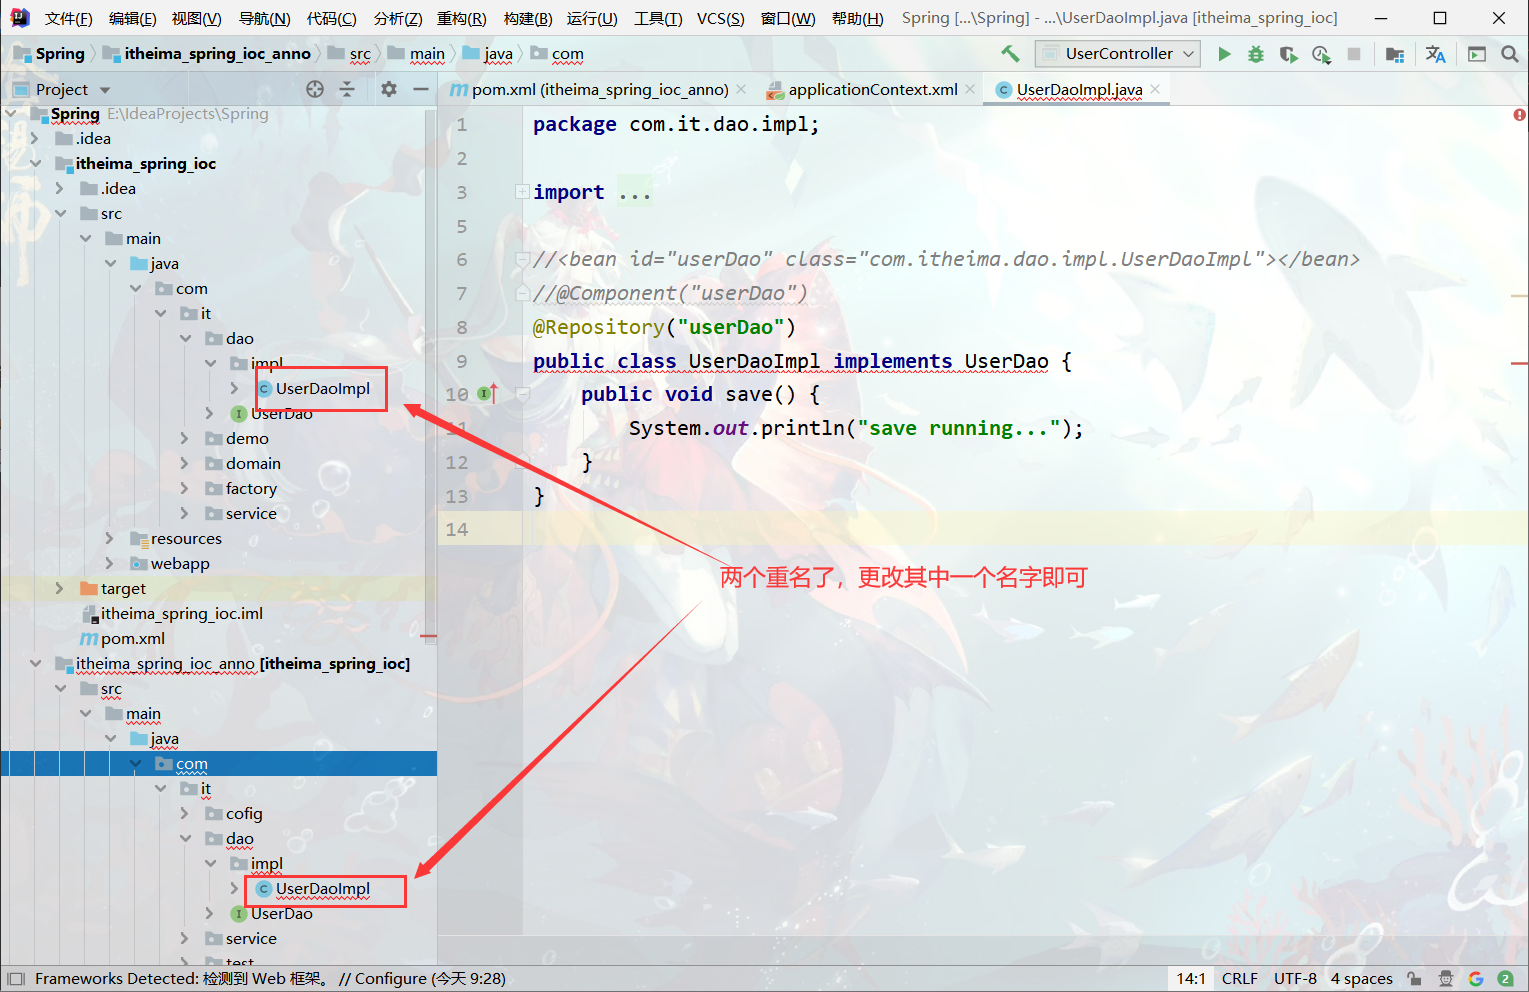
【出现问题】Duplicate class found in the file
在文件中发现重复的类
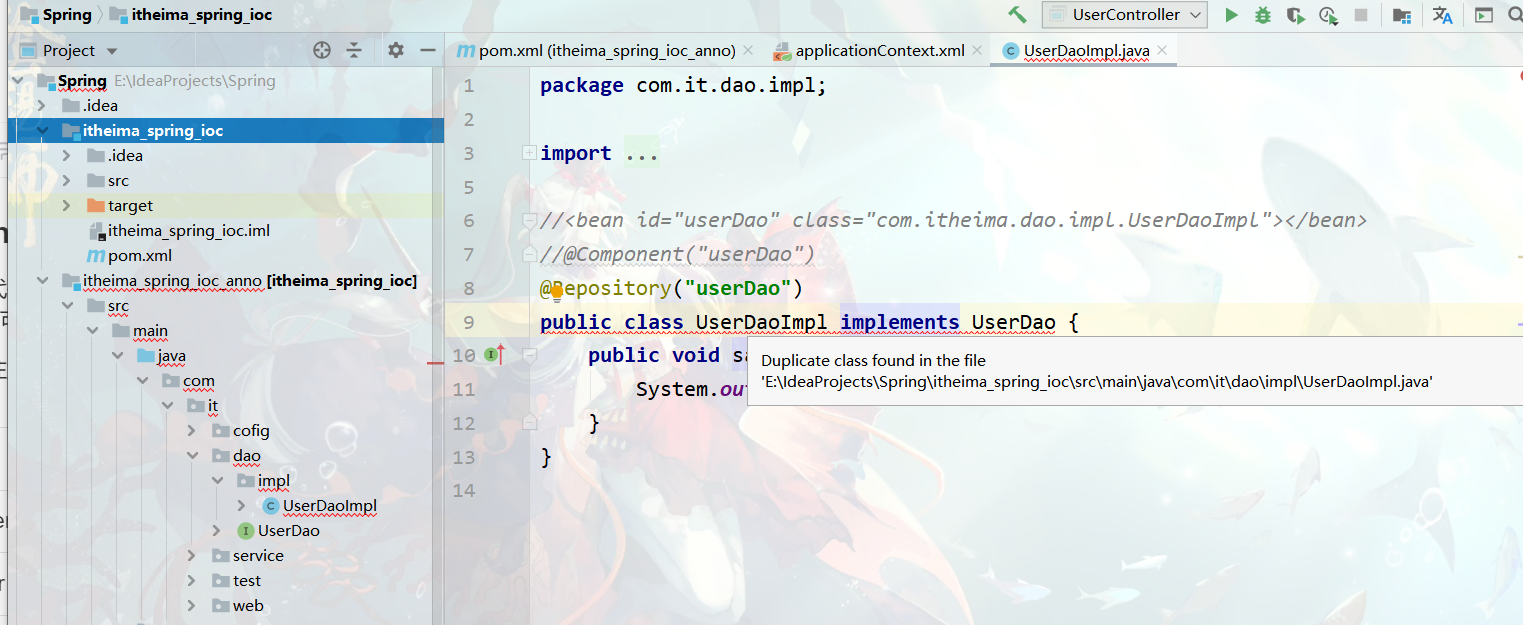
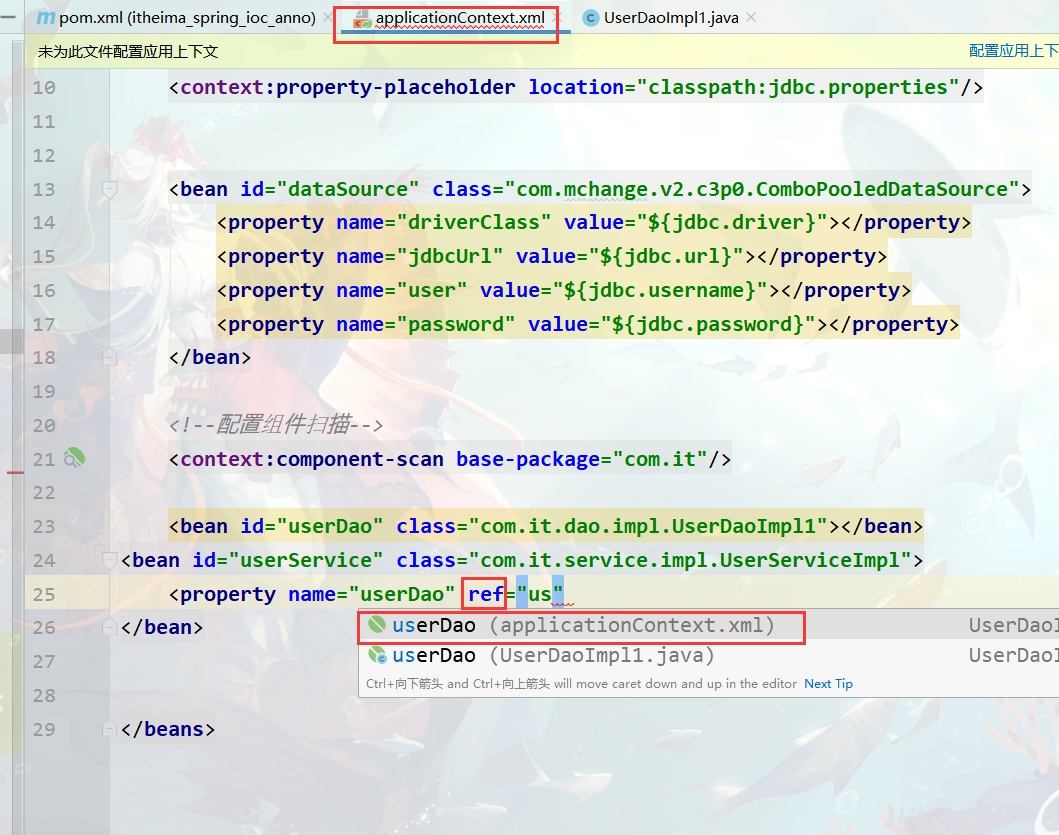
解决方法:给相同名字的类,换一个名字。
配置
结果如下:
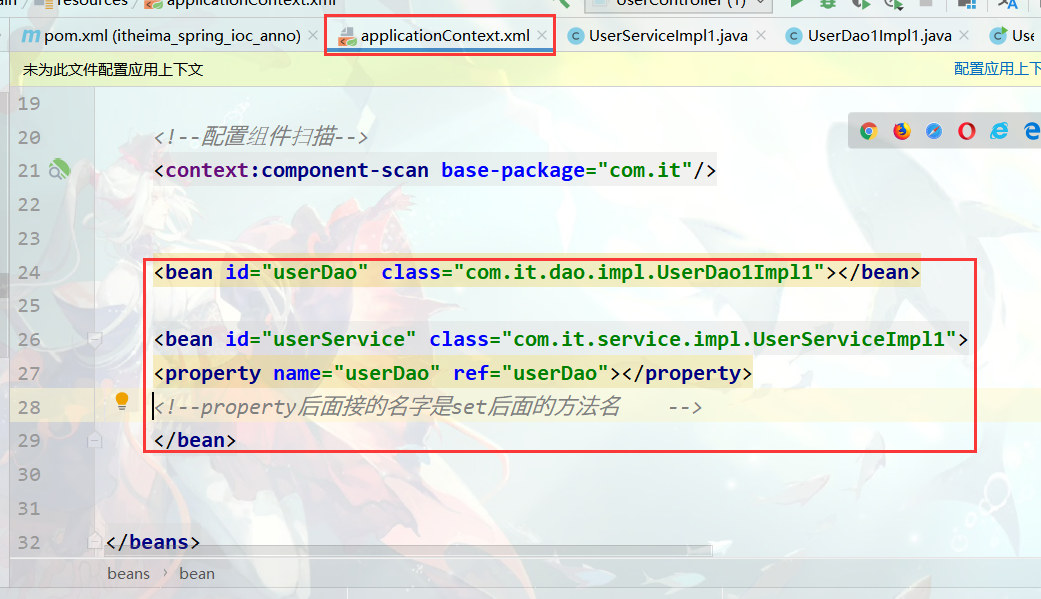
通过注解实现配置:
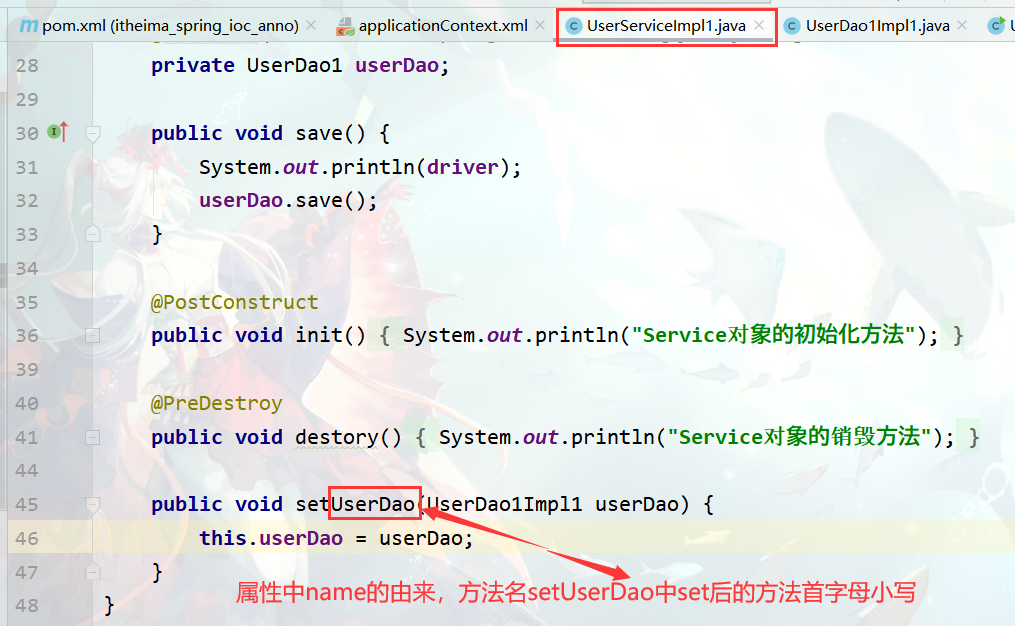
2.1 Spring原始注解
Spring是轻代码而重配置的框架,配置比较繁重,影响开发效率,所以注解开发是一种趋势,注解代替xml配置文件可以简化配置,提高开发效率。
Spring原始注解主要是替代的配置
注解 | 说明 |
@Component | 使用在类上用于实例化Bean(完成对象创建) |
@Controller | 使用在web层类上用于实例化Bean |
@Service | 使用在service层类上用于实例化Bean |
@Repository | 使用在dao层类上用于实例化Bean |
@Autowired | 使用在字段上用于根据类型依赖注入(对象类型的注入) |
@Qualifier | 结合@Autowired一起使用用于根据名称进行依赖注入 |
@Resource | 相当于@Autowired+@Qualifier,按照名称进行注入 |
@Value | 注入普通属性(普通属性的注入) |
@Scope | 标注Bean的作用范围 |
@PostConstruct | 使用在方法上标注该方法是Bean的初始化方法 |
@PreDestroy | 使用在方法上标注该方法是Bean的销毁方法 |
注意:
使用注解进行开发时,需要在applicationContext.xml中配置组件扫描,作用是指定哪个包及其子包下的Bean需要进行扫描以便识别使用注解配置的类、字段和方法。
<!--注解的组件扫描-->
<context:component-scan base-package="com.itheima"></context:component-scan>
使用@Compont或@Repository标识UserDaoImpl需要Spring进行实例化。
//@Component("userDao")
@Repository("userDao")
public class UserDaoImpl implements UserDao {
    @Override
    public void save() {
        System.out.println("save running... ...");
    }
}
使用@Compont或@Service标识UserServiceImpl需要Spring进行实例化
使用@Autowired或者@Autowired+@Qulifier或者@Resource进行userDao的注入
//@Component("userService")
@Service("userService")
public class UserServiceImpl implements UserService {
    /*@Autowired
    @Qualifier("userDao")*/
    @Resource(name="userDao")
    private UserDao userDao;
    @Override
    public void save() {
         userDao.save();
    }
}
使用@Value进行字符串的注入
@Repository("userDao")
public class UserDaoImpl implements UserDao {
    @Value("注入普通数据")
    private String str;
    @Value("${jdbc.driver}")
    private String driver;
    @Override
    public void save() {
        System.out.println(str);
        System.out.println(driver);
        System.out.println("save running... ...");
    }
}
使用@Scope标注Bean的范围
//@Scope("prototype")
@Scope("singleton")
public class UserDaoImpl implements UserDao {
   //此处省略代码
}
使用@PostConstruct标注初始化方法,使用@PreDestroy标注销毁方法
@PostConstruct
public void init(){
    System.out.println("初始化方法....");
}
@PreDestroy
public void destroy(){
    System.out.println("销毁方法.....");
}
2.2 Spring新注解
使用上面的注解还不能全部替代xml配置文件,还需要使用注解替代的配置如下:
非自定义的Bean的配置:
加载properties文件的配置:context:property-placeholder
组件扫描的配置:context:component-scan
引入其他文件:
注解 | 说明 |
@Configuration | 用于指定当前类是一个 Spring 配置类,当创建容器时会从该类上加载注解 |
@ComponentScan | 用于指定 Spring 在初始化容器时要扫描的包。 作用和在 Spring 的 xml 配置文件中的 一样 |
@Bean | 使用在方法上,标注将该方法的返回值存储到 Spring 容器中 |
@PropertySource | 用于加载.properties 文件中的配置 |
@Import | 用于导入其他配置类 |
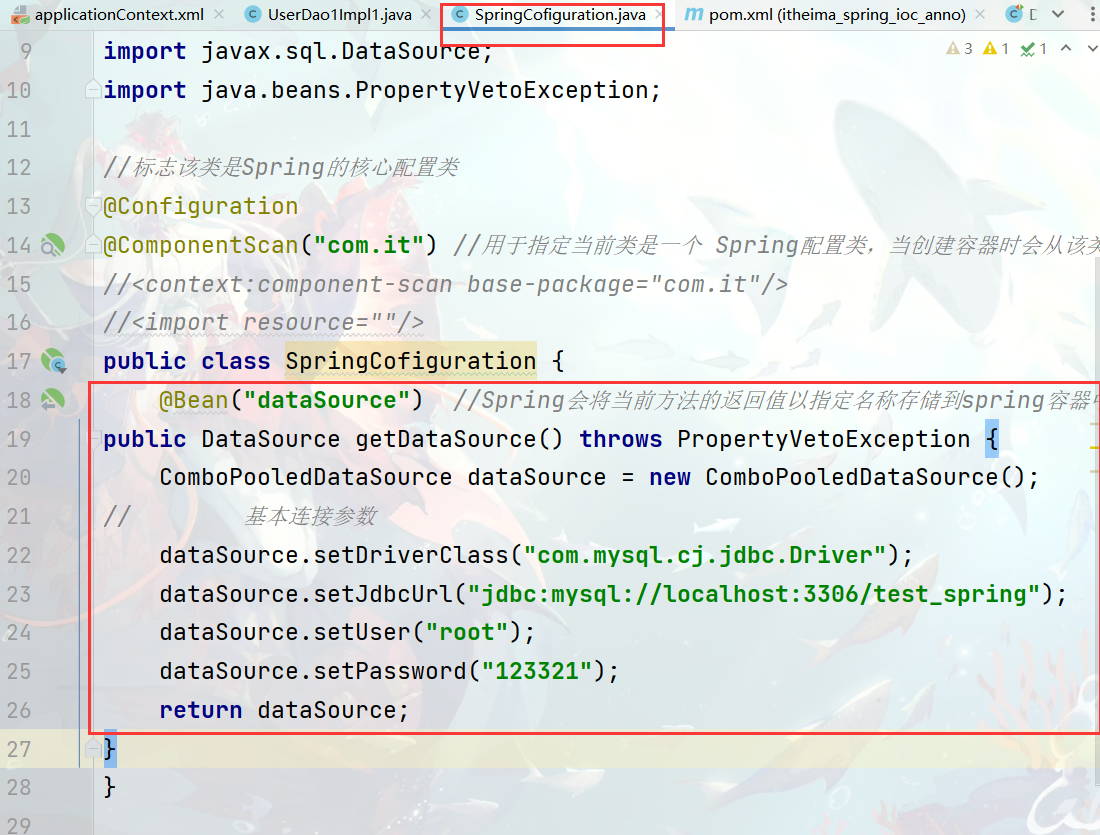
一开始我的代码:
 @Bean("dataSource")  //Spring会将当前方法的返回值以指定名称存储到spring容器中
public DataSource getDataSource() throws PropertyVetoException {
    ComboPooledDataSource dataSource = new ComboPooledDataSource();
//        基本连接参数
    dataSource.setDriverClass("com.mysql.cj.jdbc.Driver");
    dataSource.setJdbcUrl("jdbc:mysql://localhost:3306/test_spring");
    dataSource.setUser("root");
    dataSource.setPassword("123321");
    return dataSource;
}
@Configuration
@ComponentScan
@Import
@Configuration
@ComponentScan("com.itheima")
@Import({DataSourceConfiguration.class})
public class SpringConfiguration {
}
@PropertySource
@value
@PropertySource("classpath:jdbc.properties")
public class DataSourceConfiguration {
    @Value("${jdbc.driver}")
    private String driver;
    @Value("${jdbc.url}")
    private String url;
    @Value("${jdbc.username}")
    private String username;
    @Value("${jdbc.password}")
    private String password;
@Bean
@Bean(name="dataSource")
public DataSource getDataSource() throws PropertyVetoException {
    ComboPooledDataSource dataSource = new ComboPooledDataSource();
    dataSource.setDriverClass(driver);
    dataSource.setJdbcUrl(url);
    dataSource.setUser(username);
    dataSource.setPassword(password);
    return dataSource;
}
测试加载核心配置类创建Spring容器
@Test
public void testAnnoConfiguration() throws Exception {
ApplicationContext applicationContext = new
          AnnotationConfigApplicationContext(SpringConfiguration.class);    UserService userService = (UserService)
    applicationContext.getBean("userService");
    userService.save();
    DataSource dataSource = (DataSource)
    applicationContext.getBean("dataSource");
    Connection connection = dataSource.getConnection();
    System.out.println(connection);
    }
3. Spring整合Junit
3.1 原始Junit测试Spring的问题
在测试类中,每个测试方法都有以下两行代码:
 ApplicationContext ac = new ClassPathXmlApplicationContext("bean.xml");
 IAccountService as = ac.getBean("accountService",IAccountService.class);
第一行代码获得应用上的对象,第二行代码获得对应的要被测试的对象
这两行代码的作用是获取容器,如果不写的话,直接会提示空指针异常。所以又不能轻易删掉。
3.2 上述问题解决思路
让SpringJunit负责创建Spring容器,但是需要将配置文件的名称告诉它
将需要进行测试Bean直接在测试类中进行注入
3.3 Spring集成Junit步骤
①导入spring集成Junit的坐标
②使用@Runwith注解替换原来的运行期
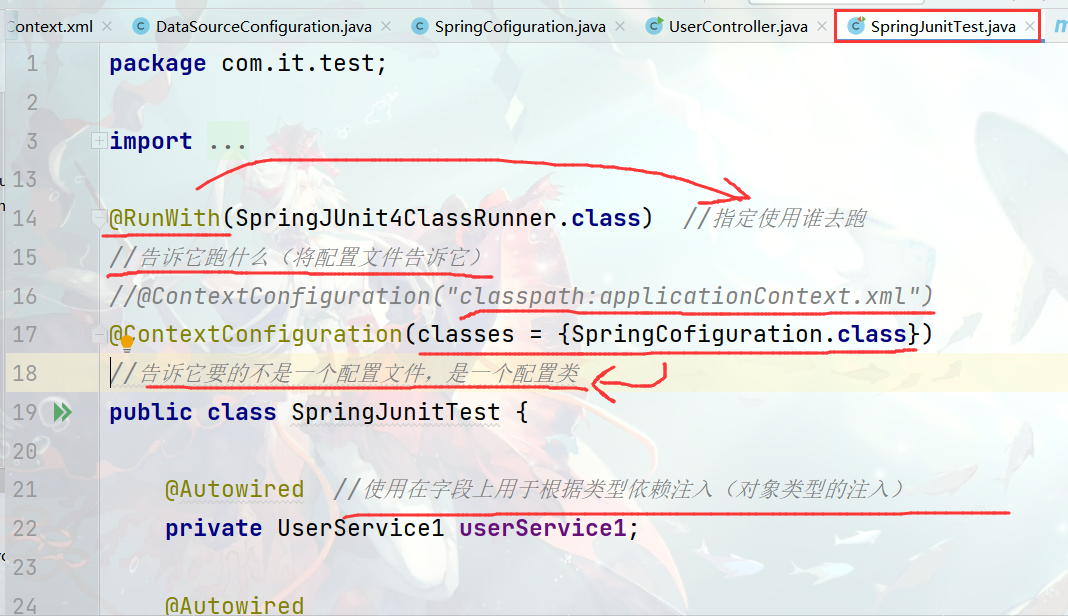
③使用@ContextConfiguration指定配置文件或配置类
④使用@Autowired注入需要测试的对象
⑤创建测试方法进行测试
3.4 Spring集成Junit代码实现
①导入spring集成Junit的坐标
<!--此处需要注意的是,spring5 及以上版本要求 junit 的版本必须是 4.12 及以上-->
<dependency>
    <groupId>org.springframework</groupId>
    <artifactId>spring-test</artifactId>
    <version>5.0.2.RELEASE</version>
</dependency>
<dependency>
    <groupId>junit</groupId>
    <artifactId>junit</artifactId>
    <version>4.12</version>
    <scope>test</scope>
</dependency>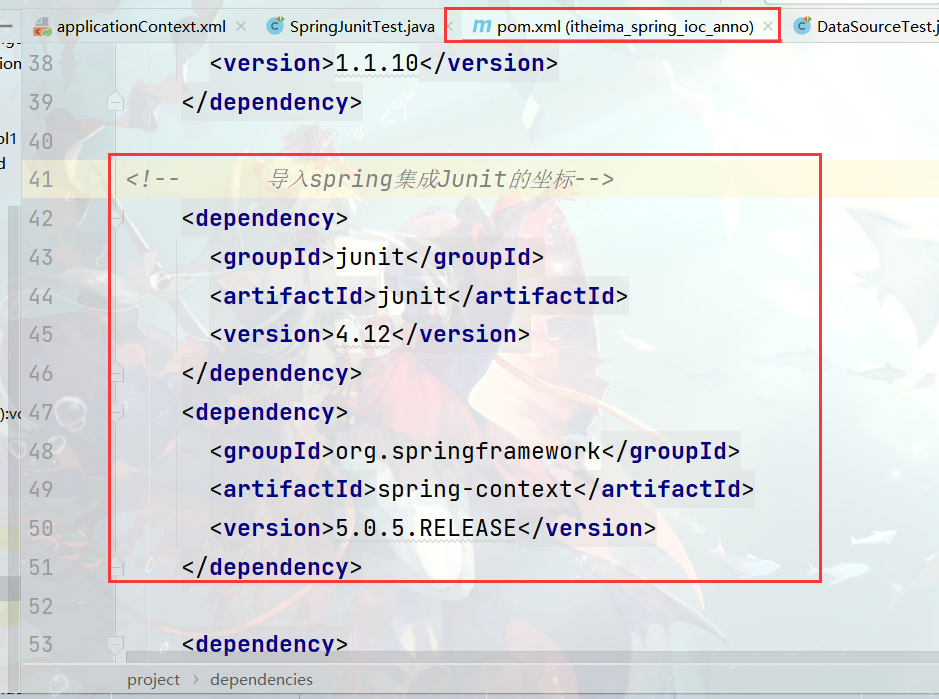
②使用@Runwith注解替换原来的运行期
@RunWith(SpringJUnit4ClassRunner.class)
public class SpringJunitTest {
}
③使用@ContextConfiguration指定配置文件或配置类
@RunWith(SpringJUnit4ClassRunner.class)
//加载spring核心配置文件
//@ContextConfiguration(value = {"classpath:applicationContext.xml"})
//加载spring核心配置类
@ContextConfiguration(classes = {SpringConfiguration.class})
public class SpringJunitTest {
}
④使用@Autowired注入需要测试的对象
@RunWith(SpringJUnit4ClassRunner.class)
@ContextConfiguration(classes = {SpringConfiguration.class})
public class SpringJunitTest {
    @Autowired
    private UserService userService;
}
⑤创建测试方法进行测试
@RunWith(SpringJUnit4ClassRunner.class)
@ContextConfiguration(classes = {SpringConfiguration.class})public class SpringJunitTest {
    @Autowired
    private UserService userService;
    @Test
    public void testUserService(){
        userService.save();
    }
}
Spring集成Junit步骤
①导入spring集成Junit的坐标
②使用@Runwith注解替换原来的运行期
③使用@ContextConfiguration指定配置文件或配置类
④使用@Autowired注入需要测试的对象
⑤创建测试方法进行测试
